Uploading & scaling drawings
Supported file types, what makes a good input drawing, and how to set an accurate scale.
Supported file formats
You can upload:
- PDF — both kinds work:
- Raster PDF, usually an image placed inside a PDF.
- Vector PDF, usually a DWG saved as a PDF — see Preparing DWG drawings.
- PNG, TIFF, JPEG, JPG and WebP — any drawing on your screen can be screenshotted into one of these, and any drawing on paper can be photographed with a smartphone.
- ZIP — an archive containing several PDFs or images, uploaded in one go.
Each file can be up to 20 MB.
Drawing types
- Floor plans — one per storey of the building.
- Elevations — optional, and used to give storeys, doors and windows their real heights instead of default values.
Other drawing types, such as section drawings, are on the roadmap but aren't supported yet.
Uploading floor plans
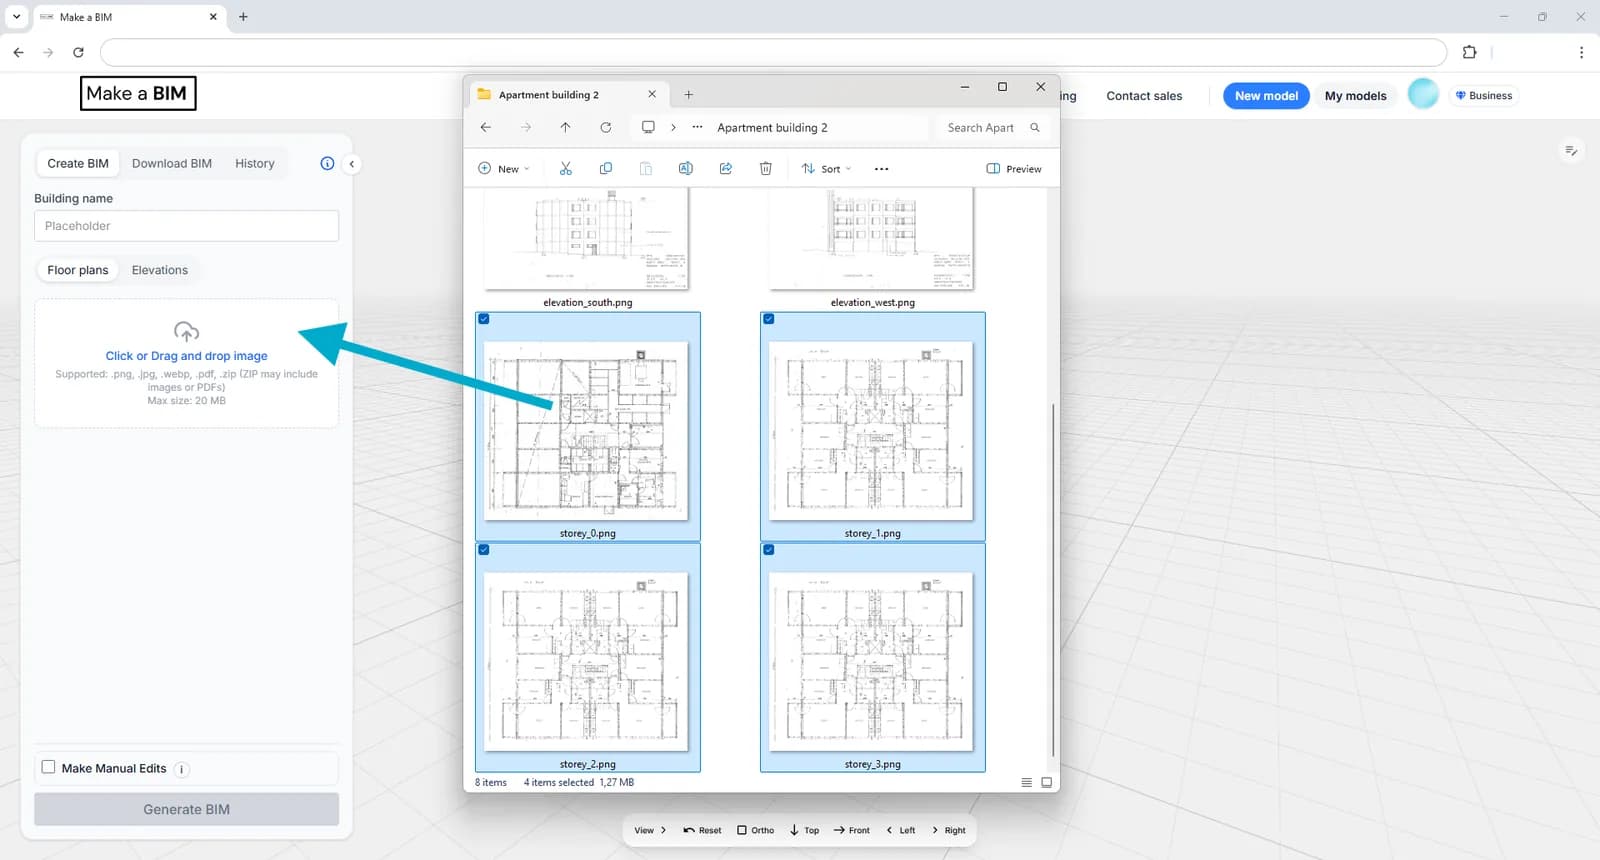
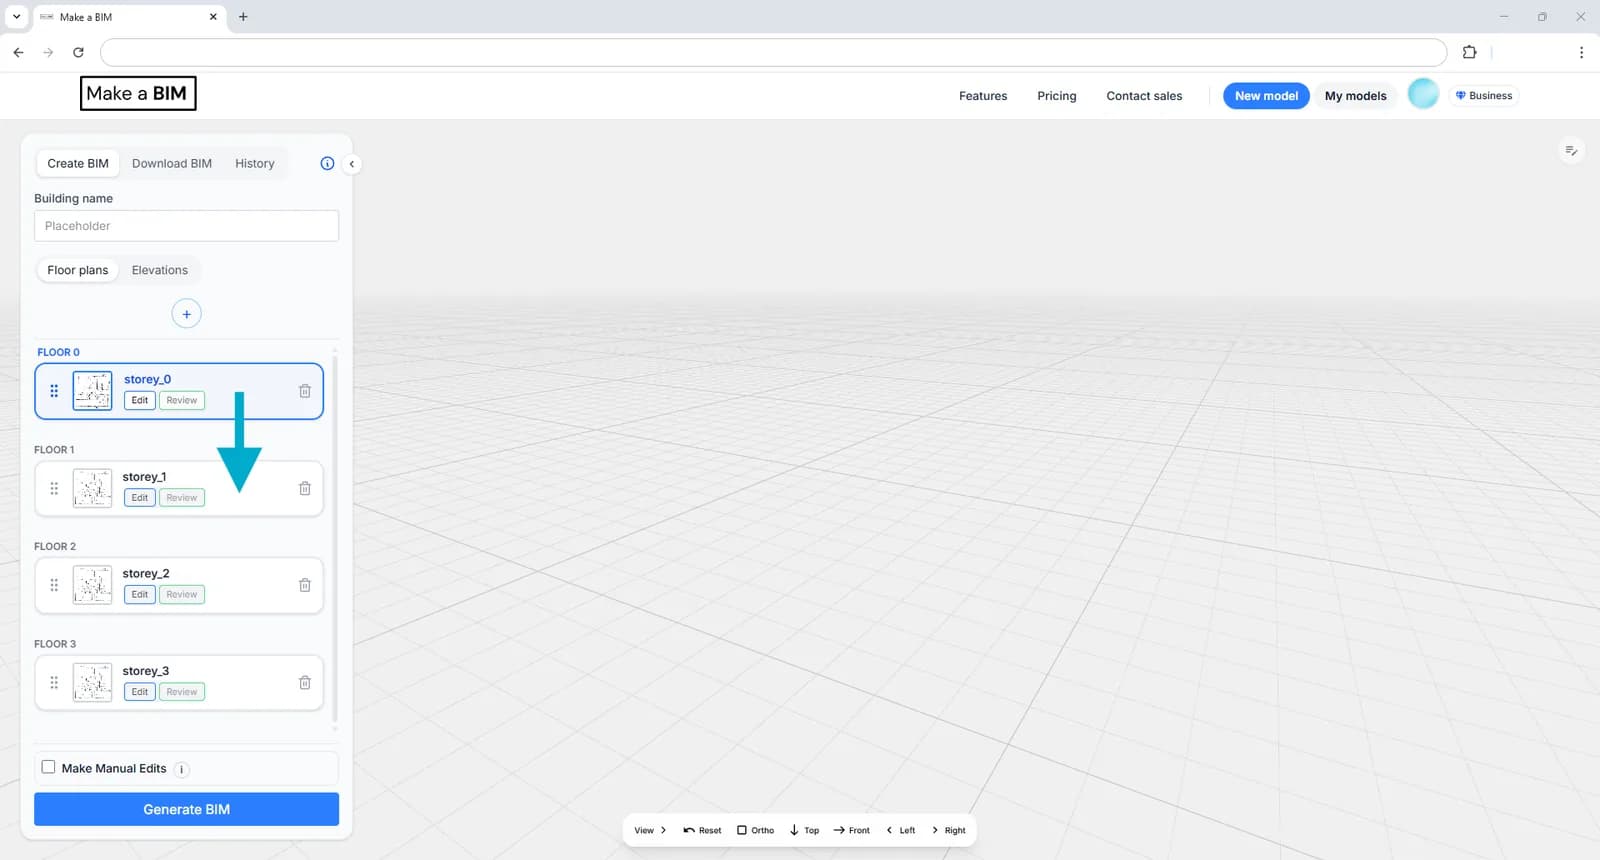
In Create BIM, drag and drop one or more floor plan drawings onto the page. Once they're uploaded, you can reorganize them by clicking and dragging — the order defines the storey order, from lowest to highest.
Uploading elevation drawings
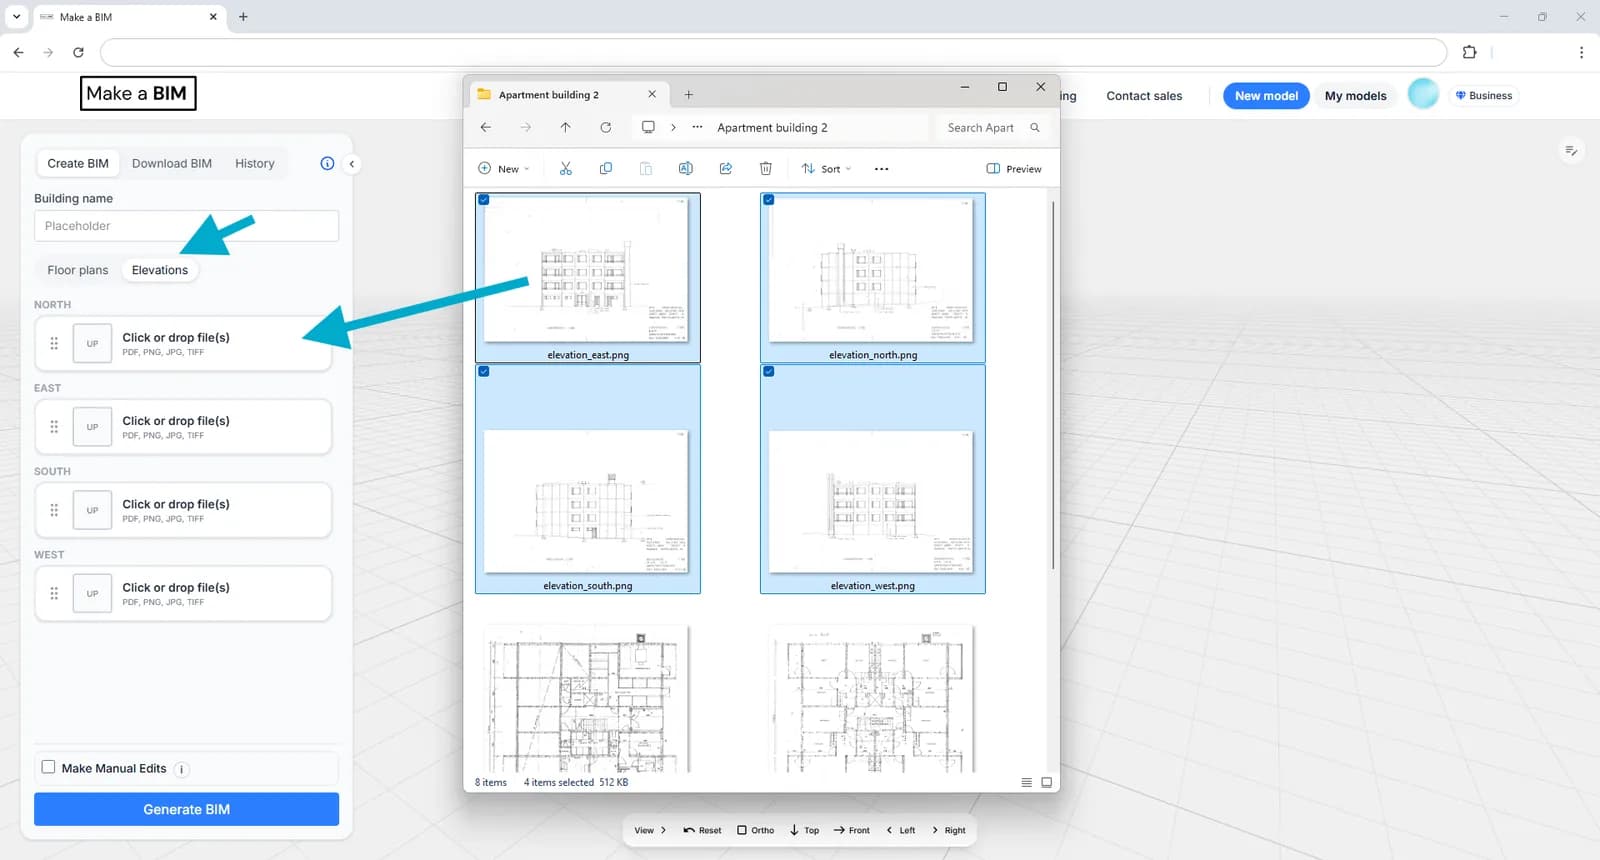
To upload elevations, first switch to Elevations in the left panel (while in Create BIM), then drag and drop the elevation drawings there. See Floors & elevations for how they're matched to compass directions.
Setting the scale
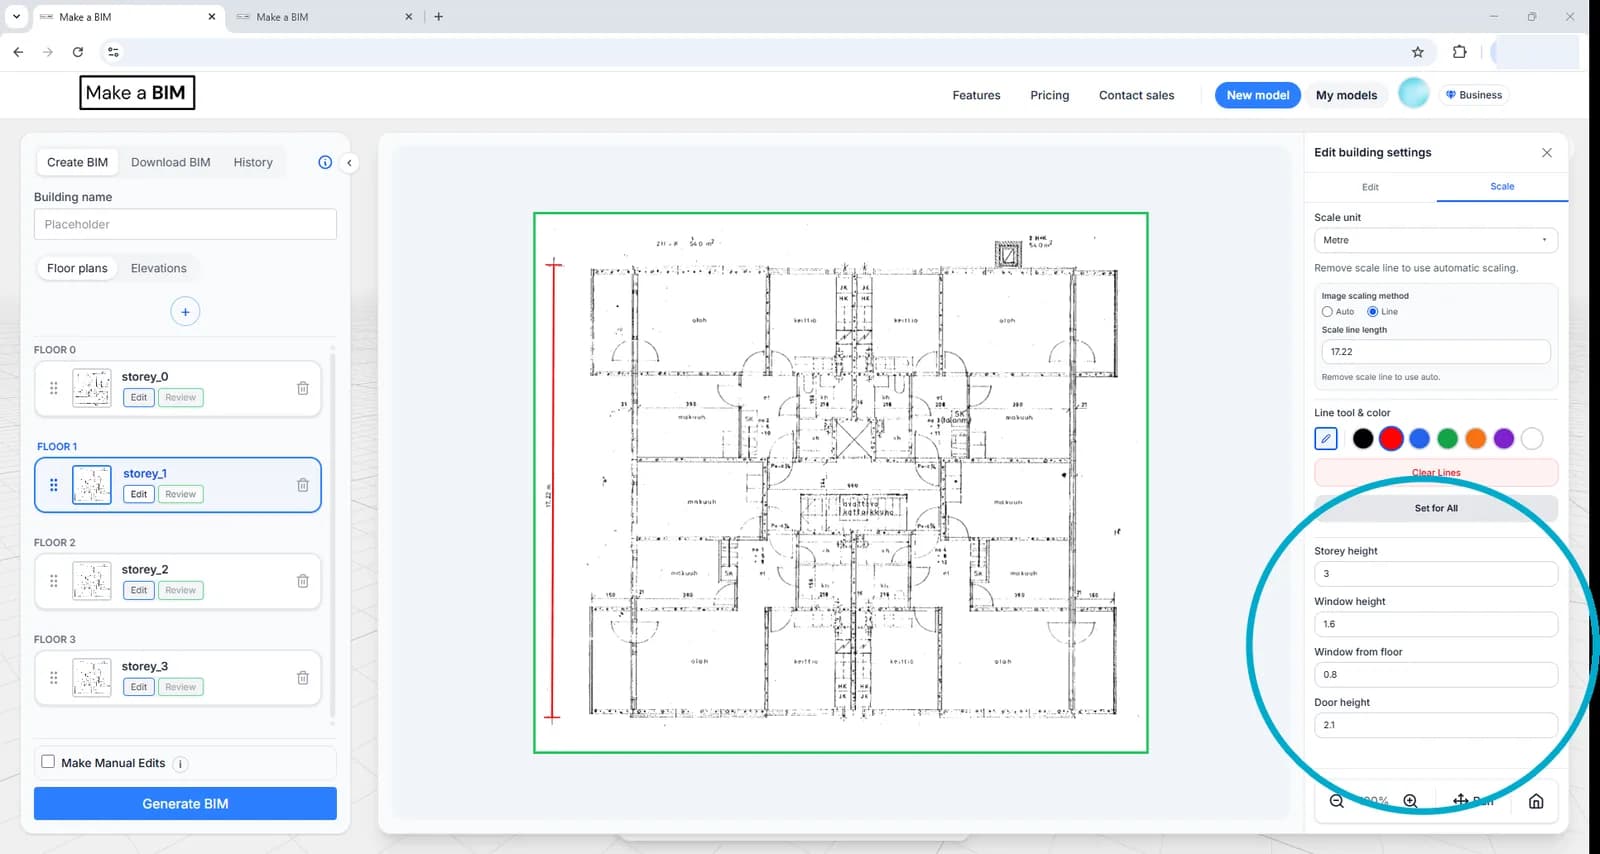
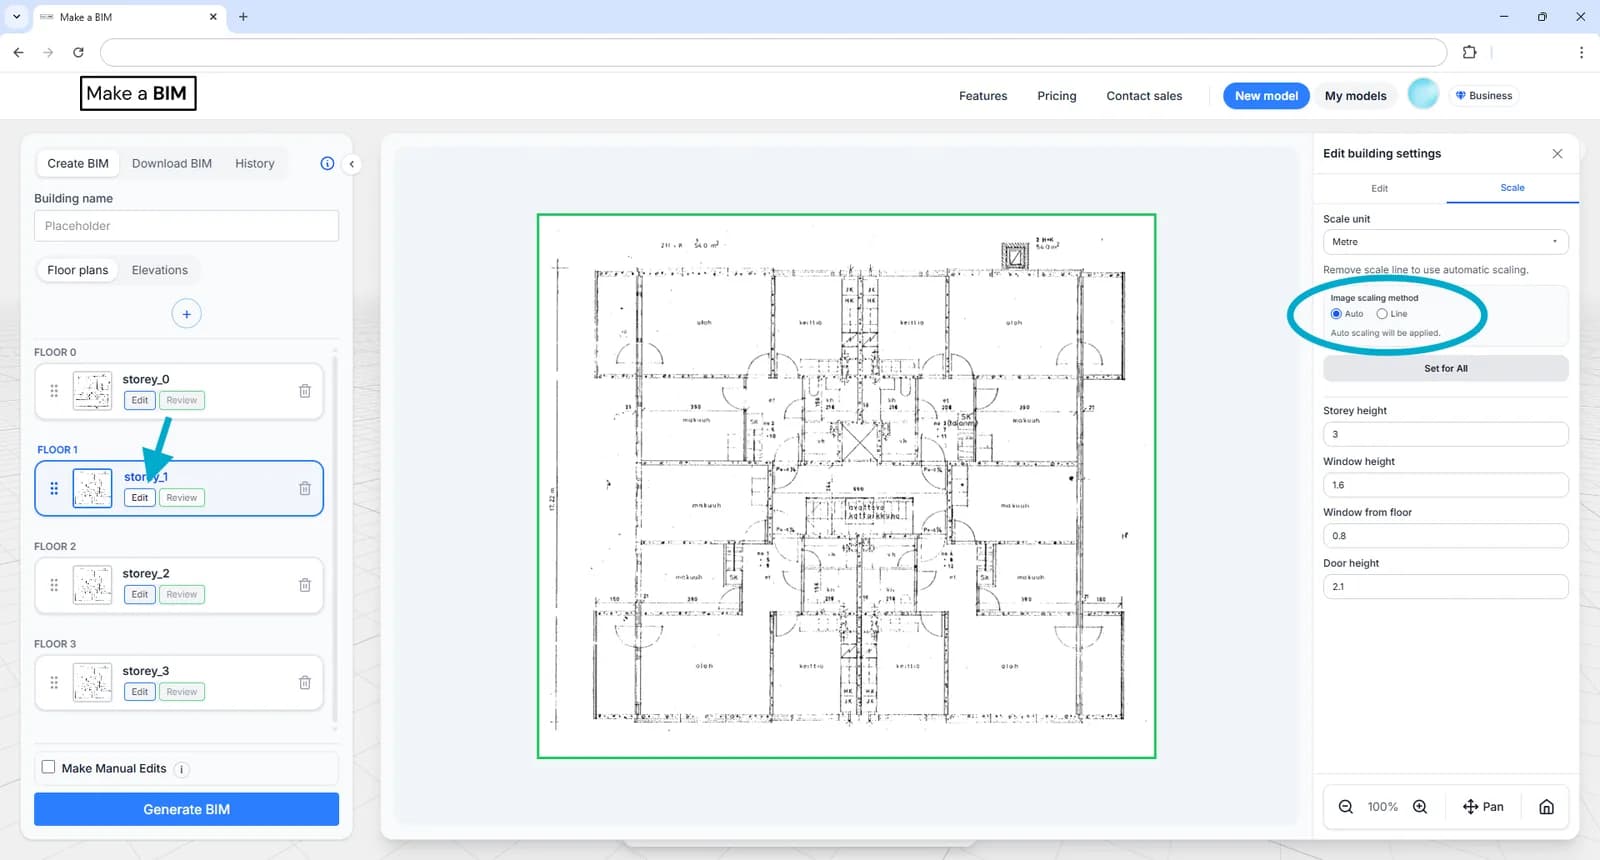
Every drawing needs a scale so that real-world distances (wall lengths, room areas, storey heights) can be calculated correctly. Choose a method under Image scaling method in the right-hand panel for each drawing.
Auto
The default for every drawing. The scale is detected automatically from the drawing where possible — for example from a scale bar, or from the vector data in a vector PDF. Always double-check the result against a known dimension before continuing.
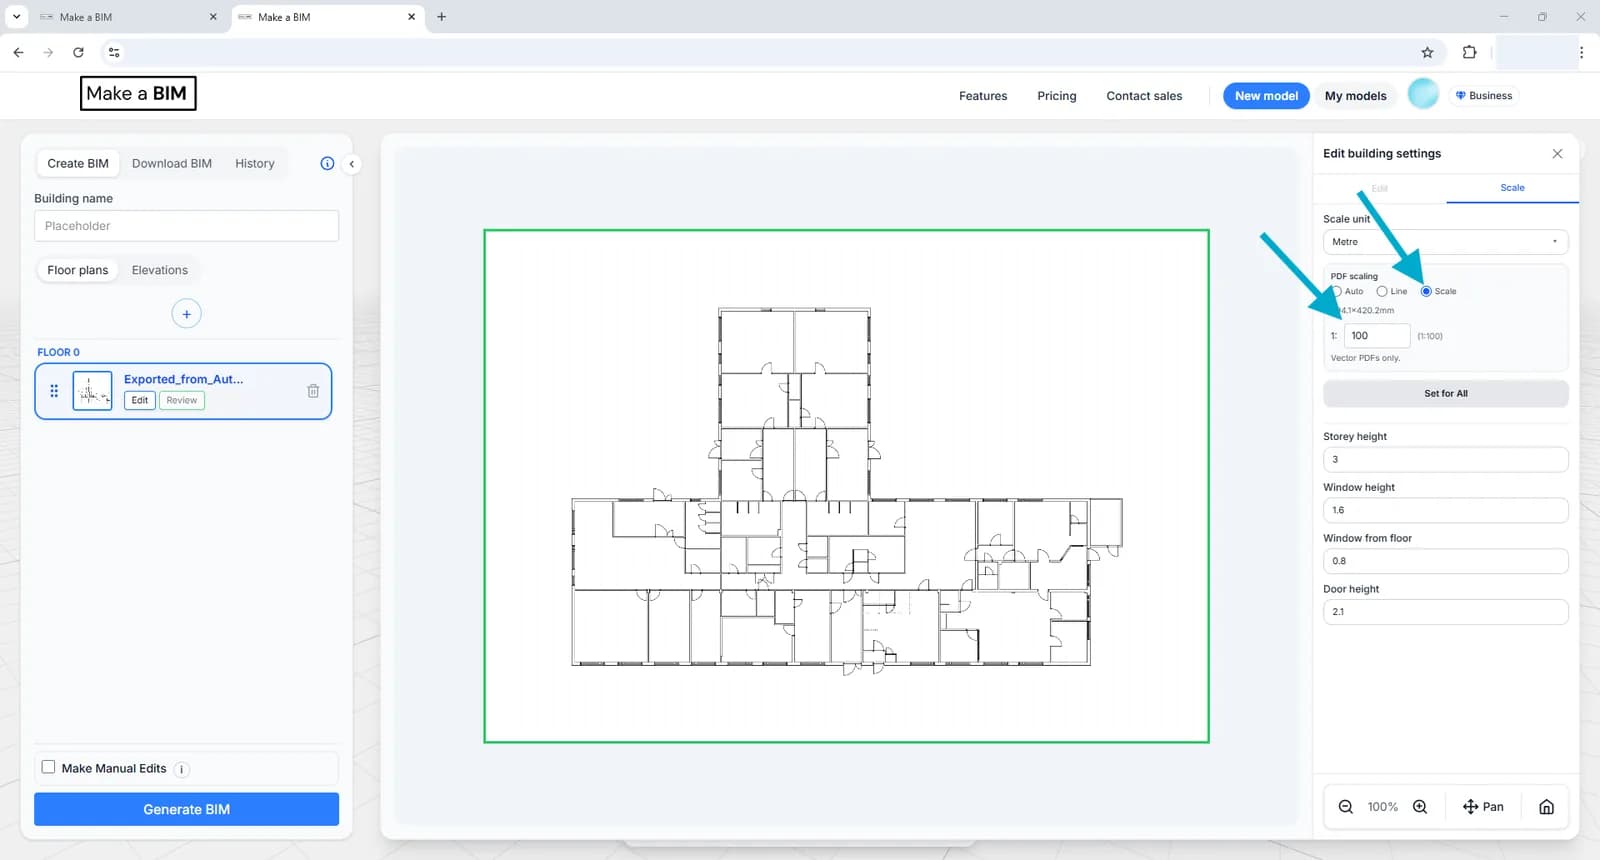
Scale (1:X)
If you know the drawing's scale, enter it directly — for example 1:100 or 1:50. This option is only available for PDF uploads, and only when the PDF's scale is actually known. It is also disabled for cropped PDFs; use Auto or Line in that case.
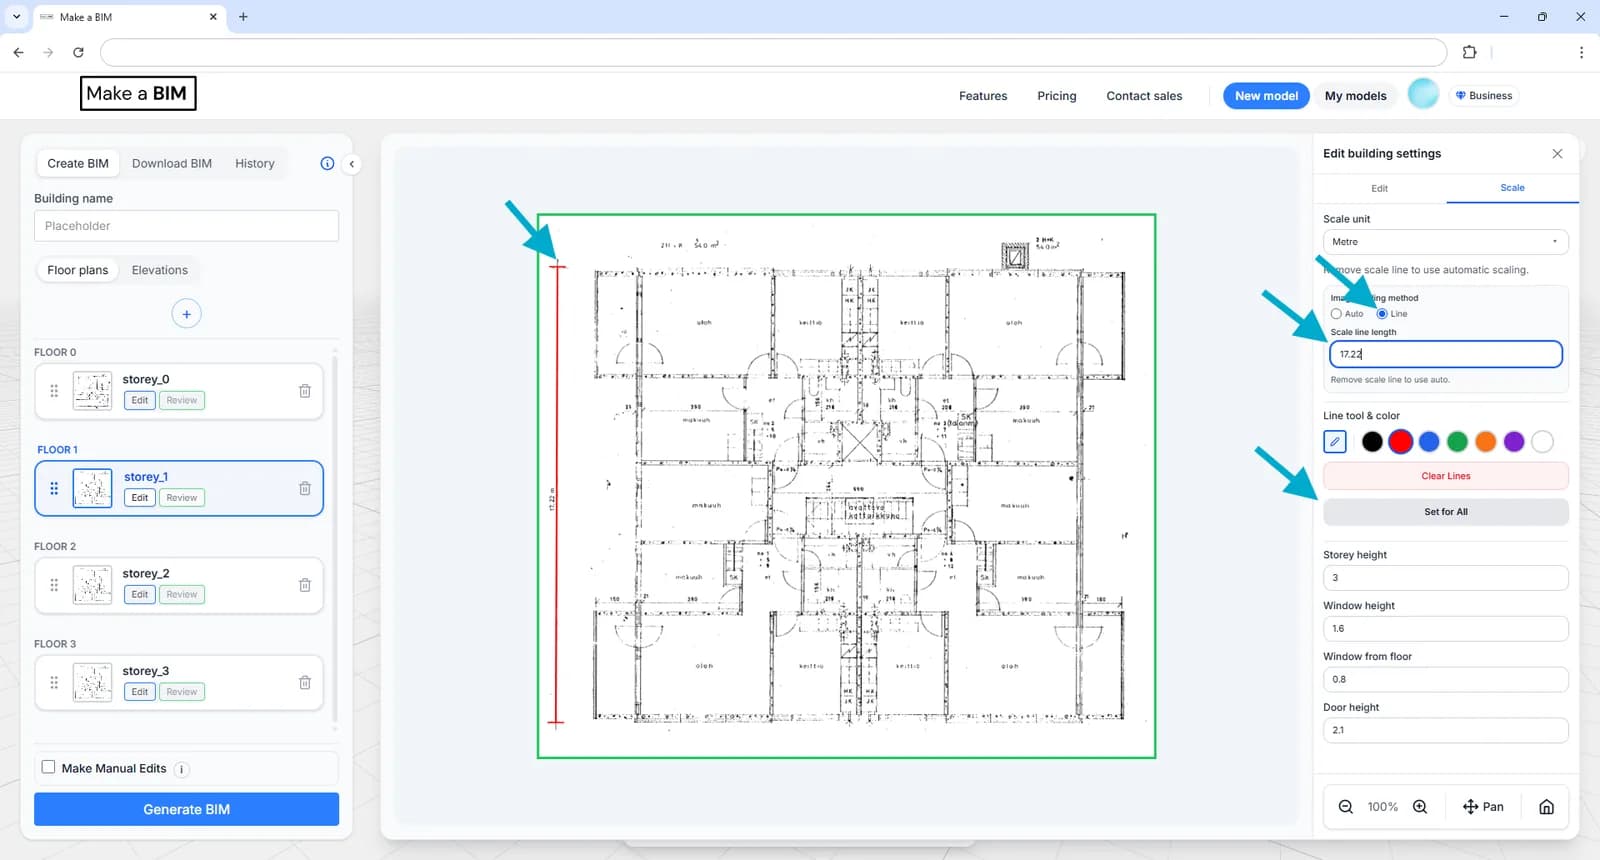
Line
Measure a known distance in the drawing:
- Click Line under Image scaling method.
- Draw a line along a dimension line in the drawing.
- Enter the real length of that line in the box below. The default unit is meters, so 17220 mm is entered as
17.22. - Click Set for All to apply the same calibration to every drawing.
Height settings
Height settings are edited from the right-hand panel while an input image is in Edit mode, and are set individually for each storey. Where nothing is specified, these defaults are used:
- Storey height: 3.0 m
- Door height: 2.1 m
- Window height: 1.6 m, starting 0.8 m above the floor