Reviewing & editing in 2D
The workflow for checking what was detected on each drawing, correcting it, and finalizing the BIM.
Opening a model for 2D editing
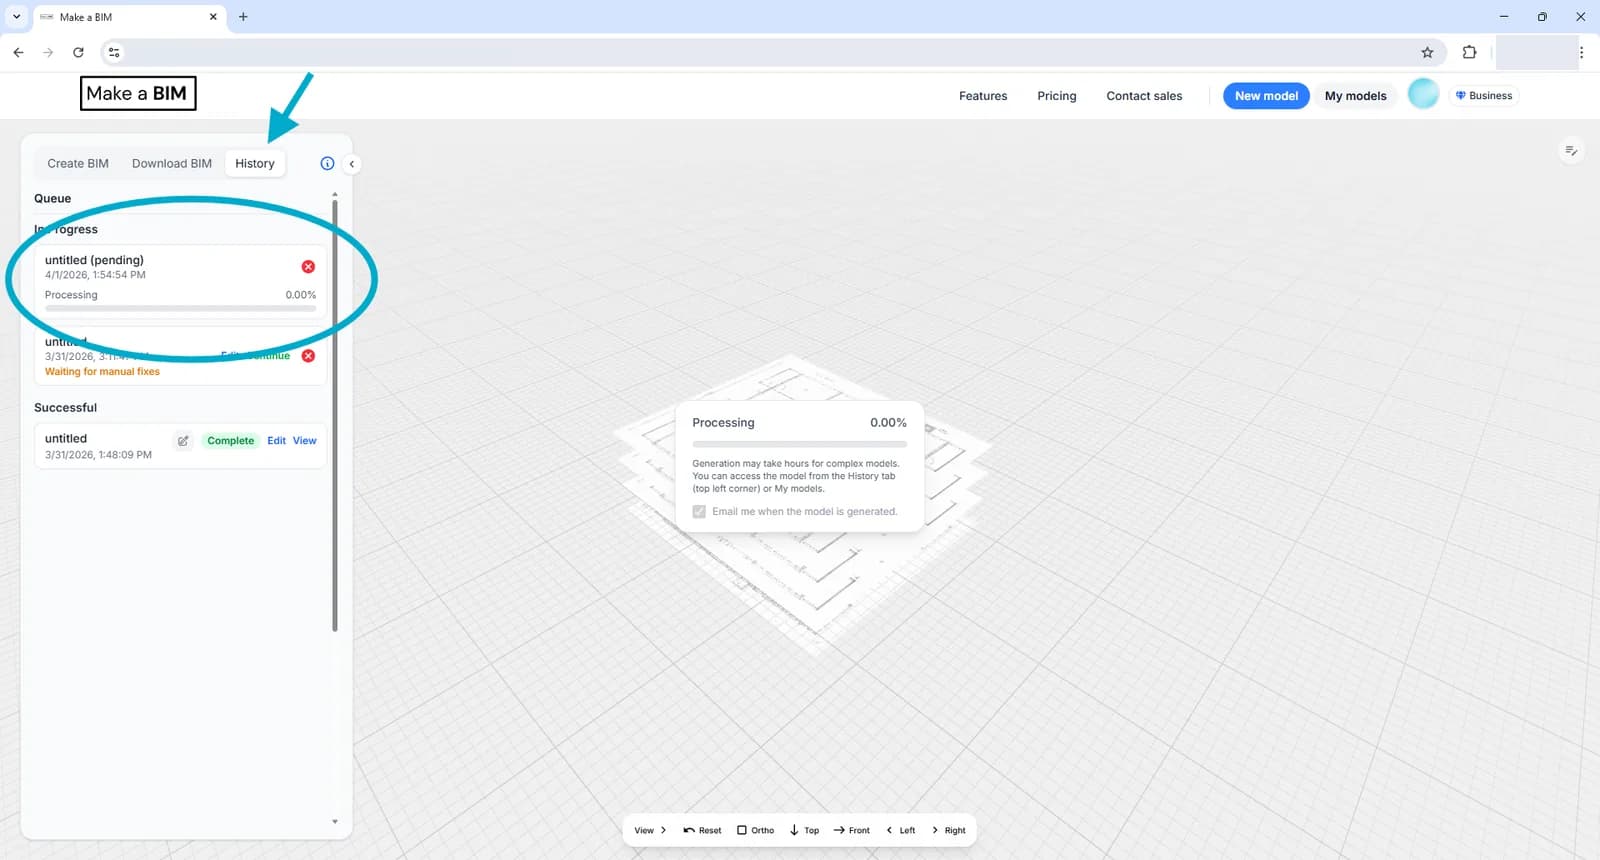
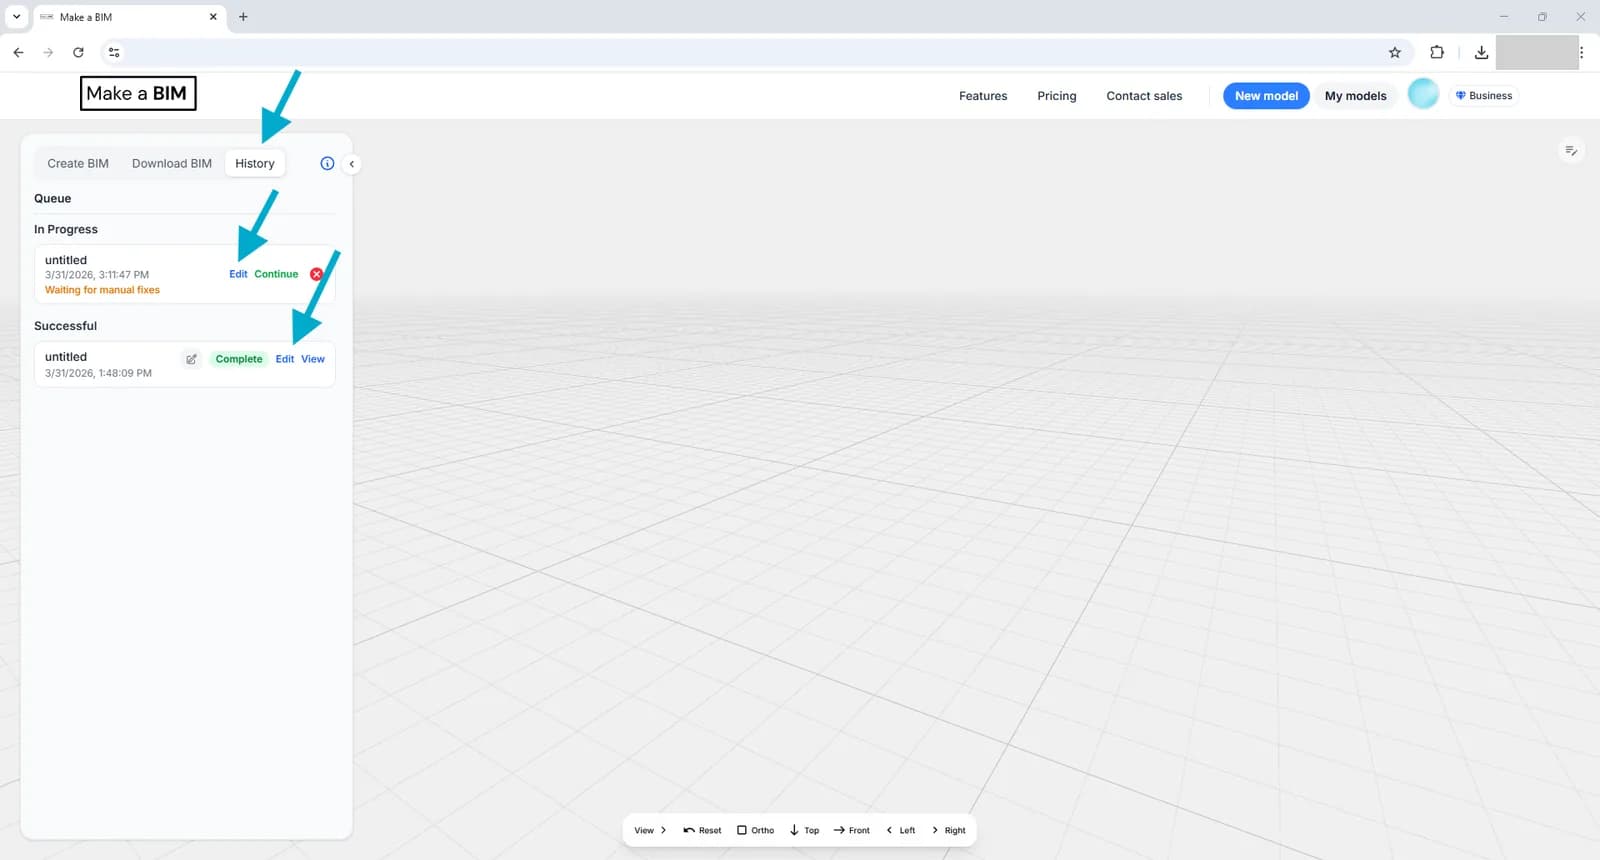
If you generated a model with Make Manual Edits selected, the 2D editor opens automatically once generation finishes. You can also open any model for editing from the History tab by clicking that model's Edit button.
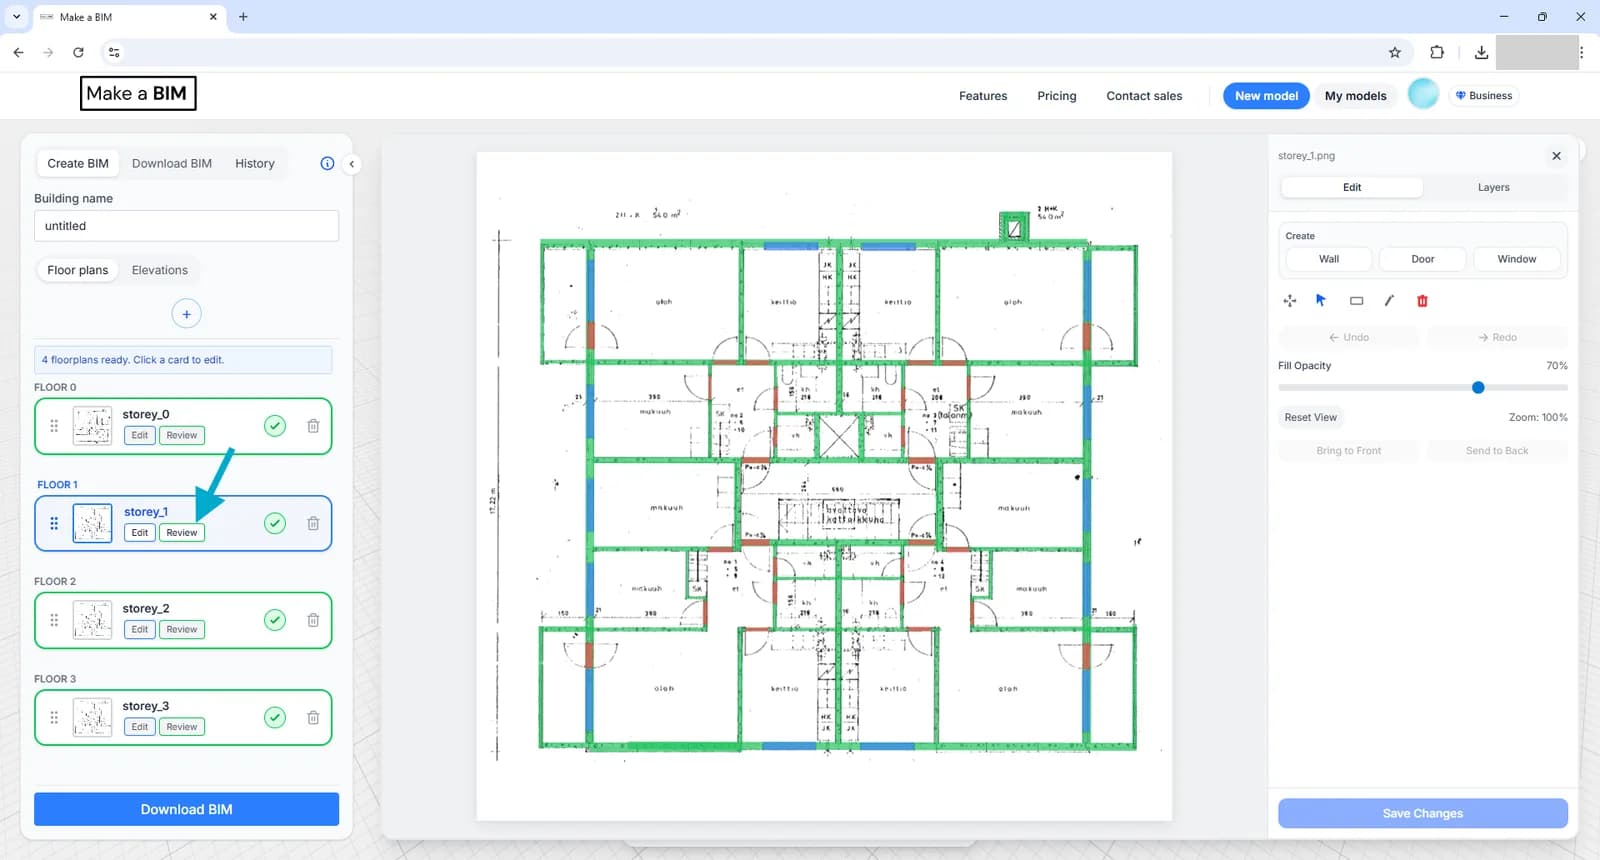
With the project open, click Review on any drawing. Coloured objects appear on top of the drawing, showing what was detected:
- Green — walls
- Blue — windows
- Orange — doors
Editing and deleting objects
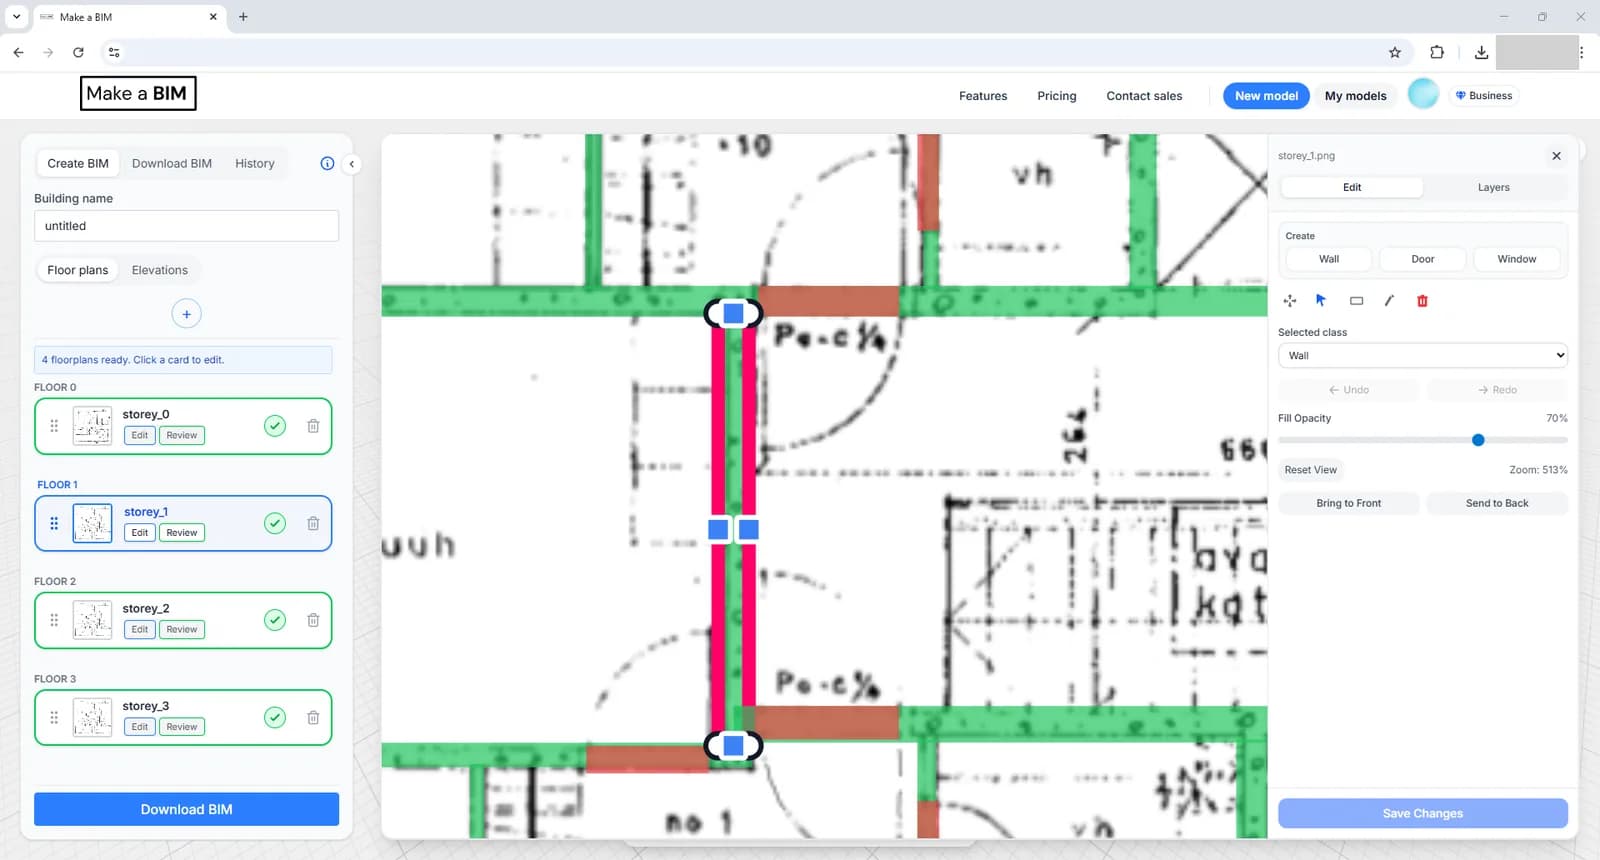
Click an object to select it — the selection is highlighted with an outline. From there:
- Drag the handles in the corners and at the middle of each edge to stretch the object.
- Click and drag inside the object to move it.
- Press Delete to remove the selected object.
Creating new objects
- Pick the object type you want to create in the right-hand panel — for example Wall.
- Click and drag a box where the object should go. The object is placed there.
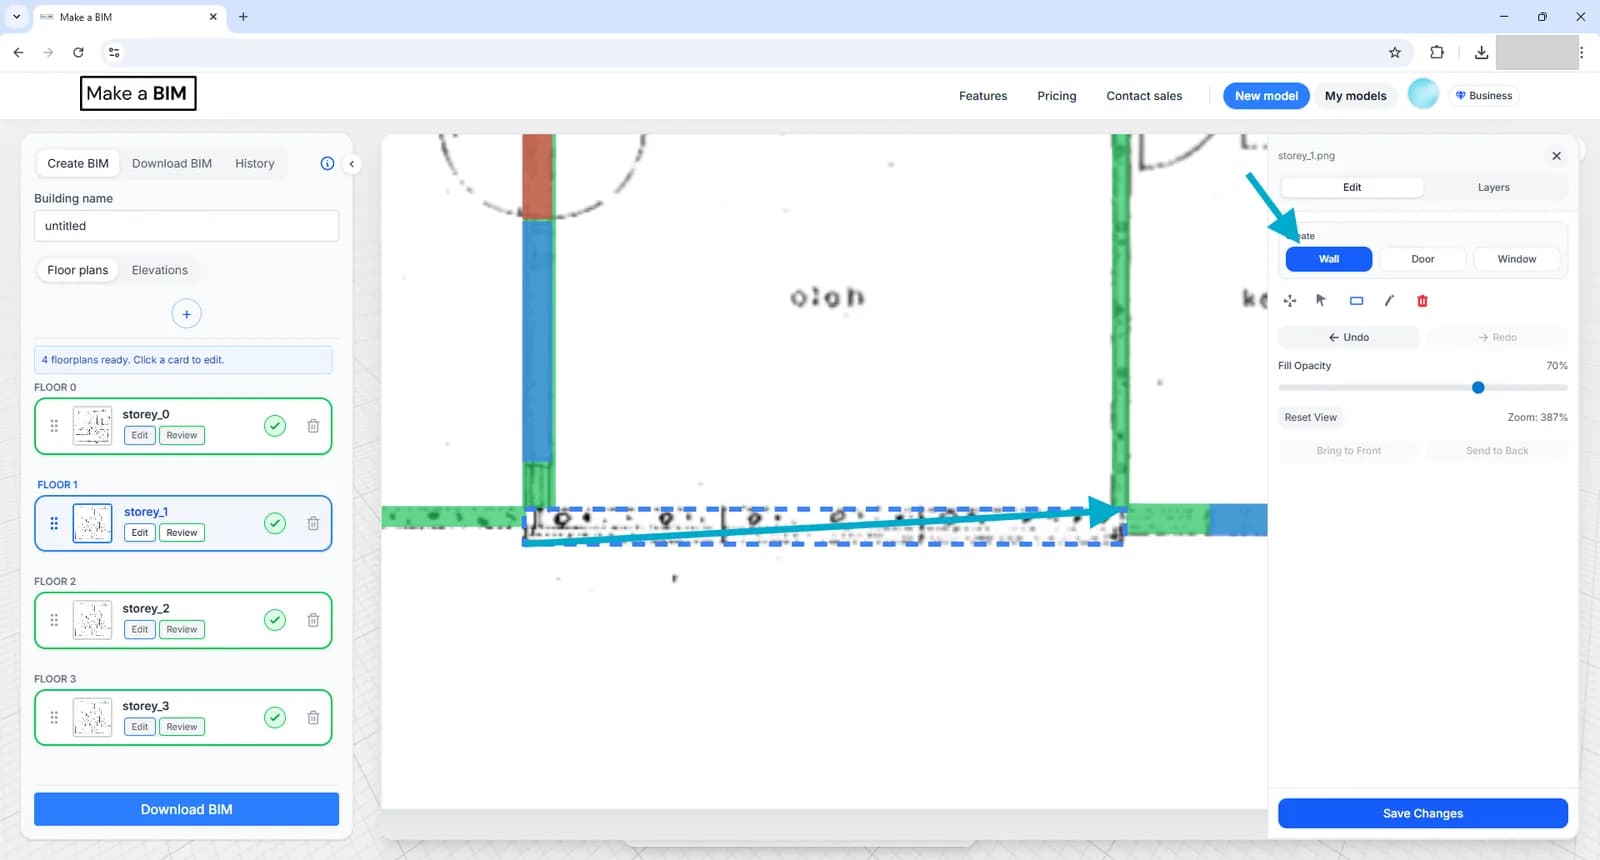
For the full set of tools, snapping behaviour and keyboard shortcuts, see Editor tools & shortcuts.
Saving your edits
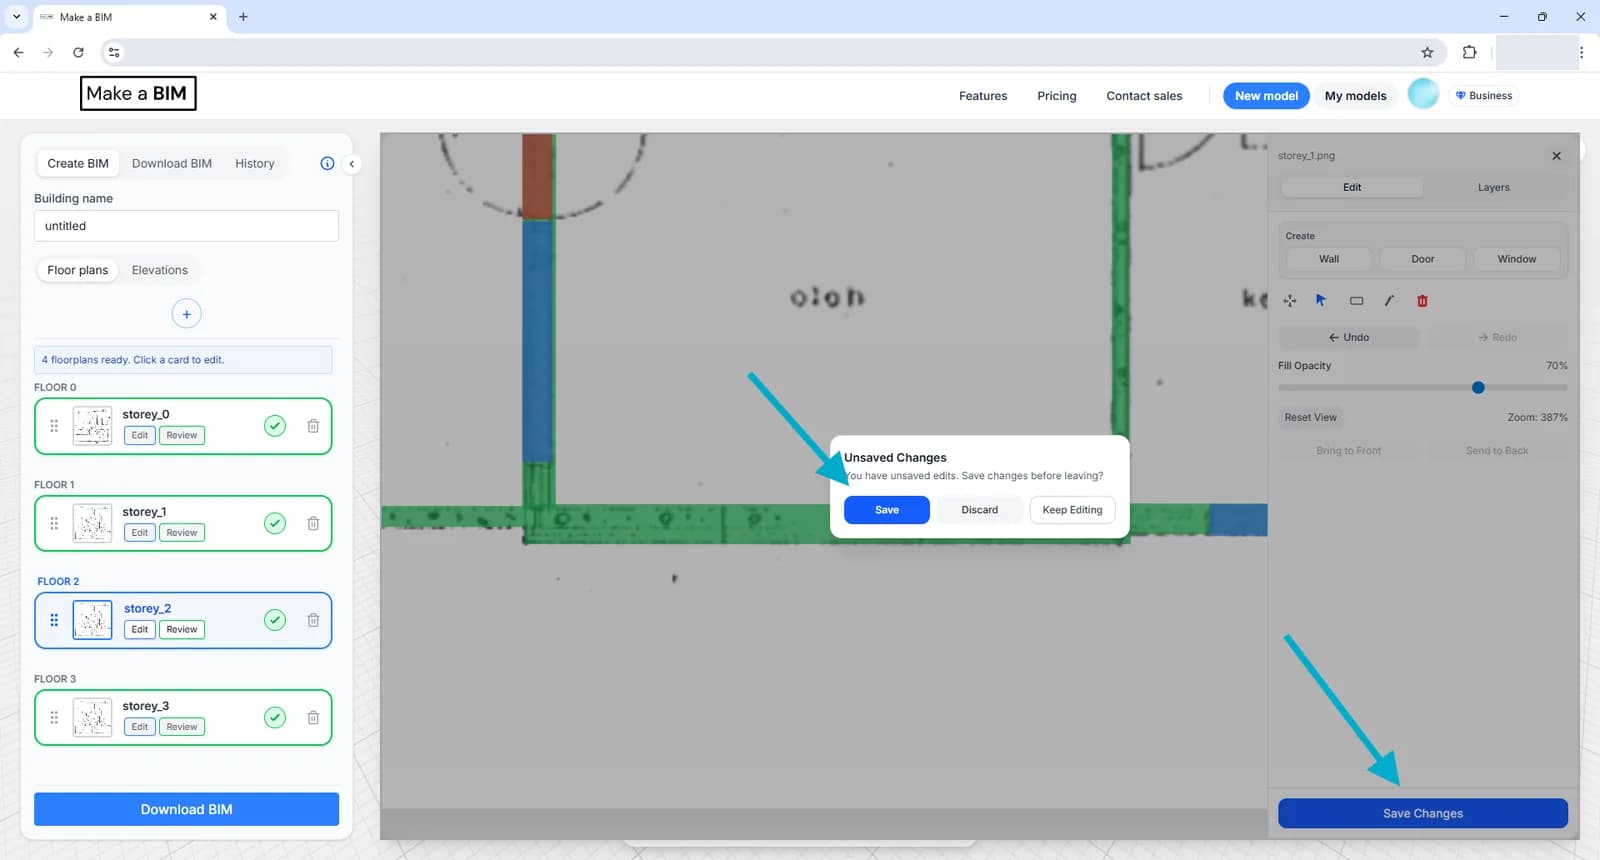
Save with the Save Changes button and give it a few seconds to complete. If you try to leave a drawing with unsaved changes, a popup offers to save them for you first.
Finalizing the BIM
Once you've edited and saved every drawing you wanted to change, click Finalize BIM Generation. This rebuilds the BIM from your corrected drawings.
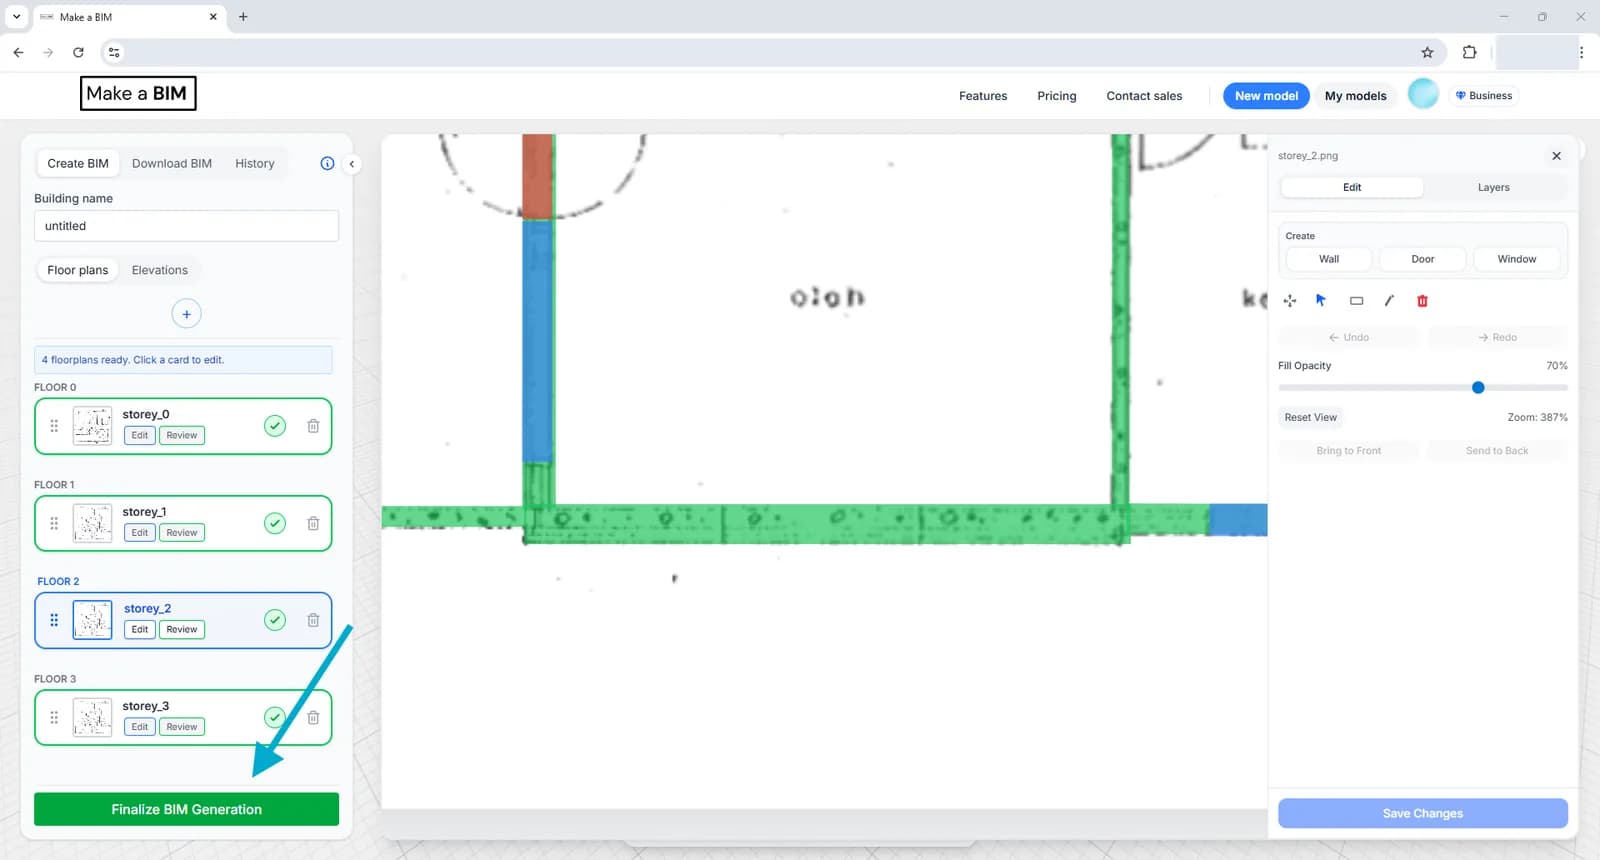
Finalizing takes a while, just like the first generation. You can follow its progress from the History tab — be patient here as well, since the loading bar may not appear immediately.