Preparing DWG drawings
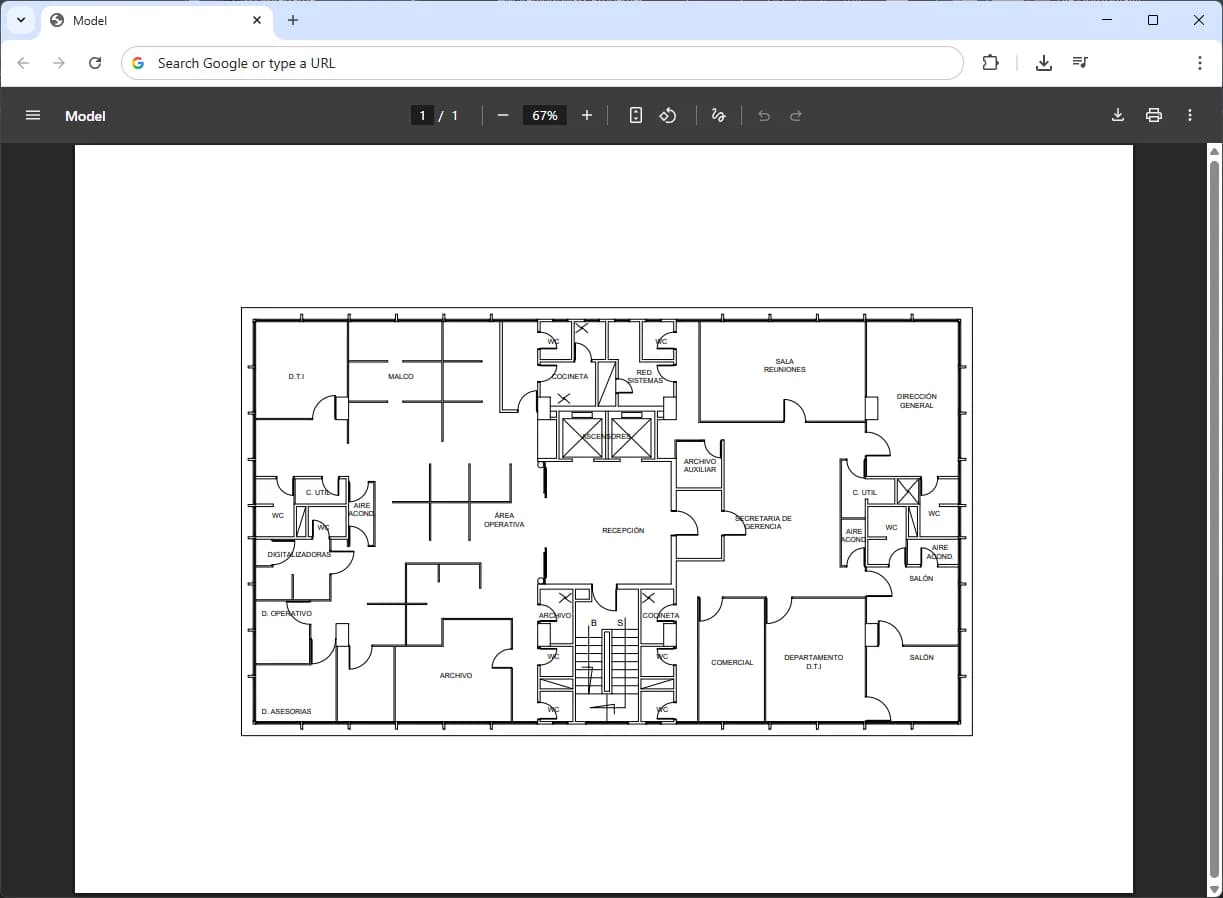
DWG files can't be uploaded directly, but converting them to vector PDF takes a couple of minutes and gives some of the best results you can get.
The short version
DWG files from AutoCAD can't be used directly, but they convert cleanly to vector PDF, which works very well. You can do this in AutoCAD itself or in the free Autodesk DWG TrueView software.
- Open your DWG.
- Select Plot and save the drawing to a PDF.
Optionally, for a noticeably better result:
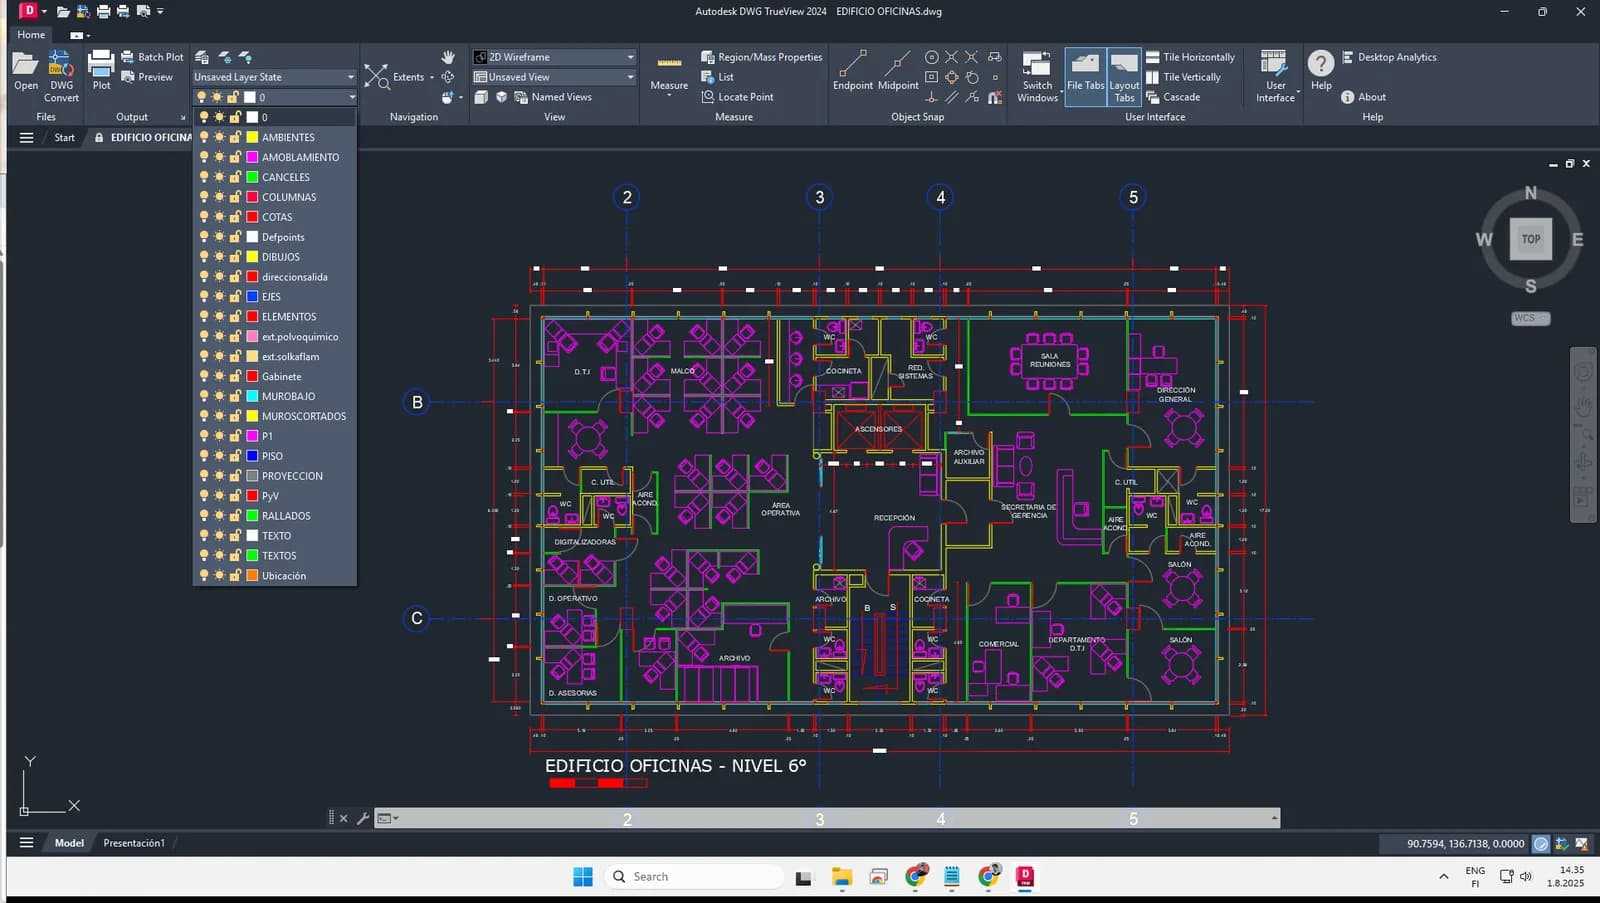
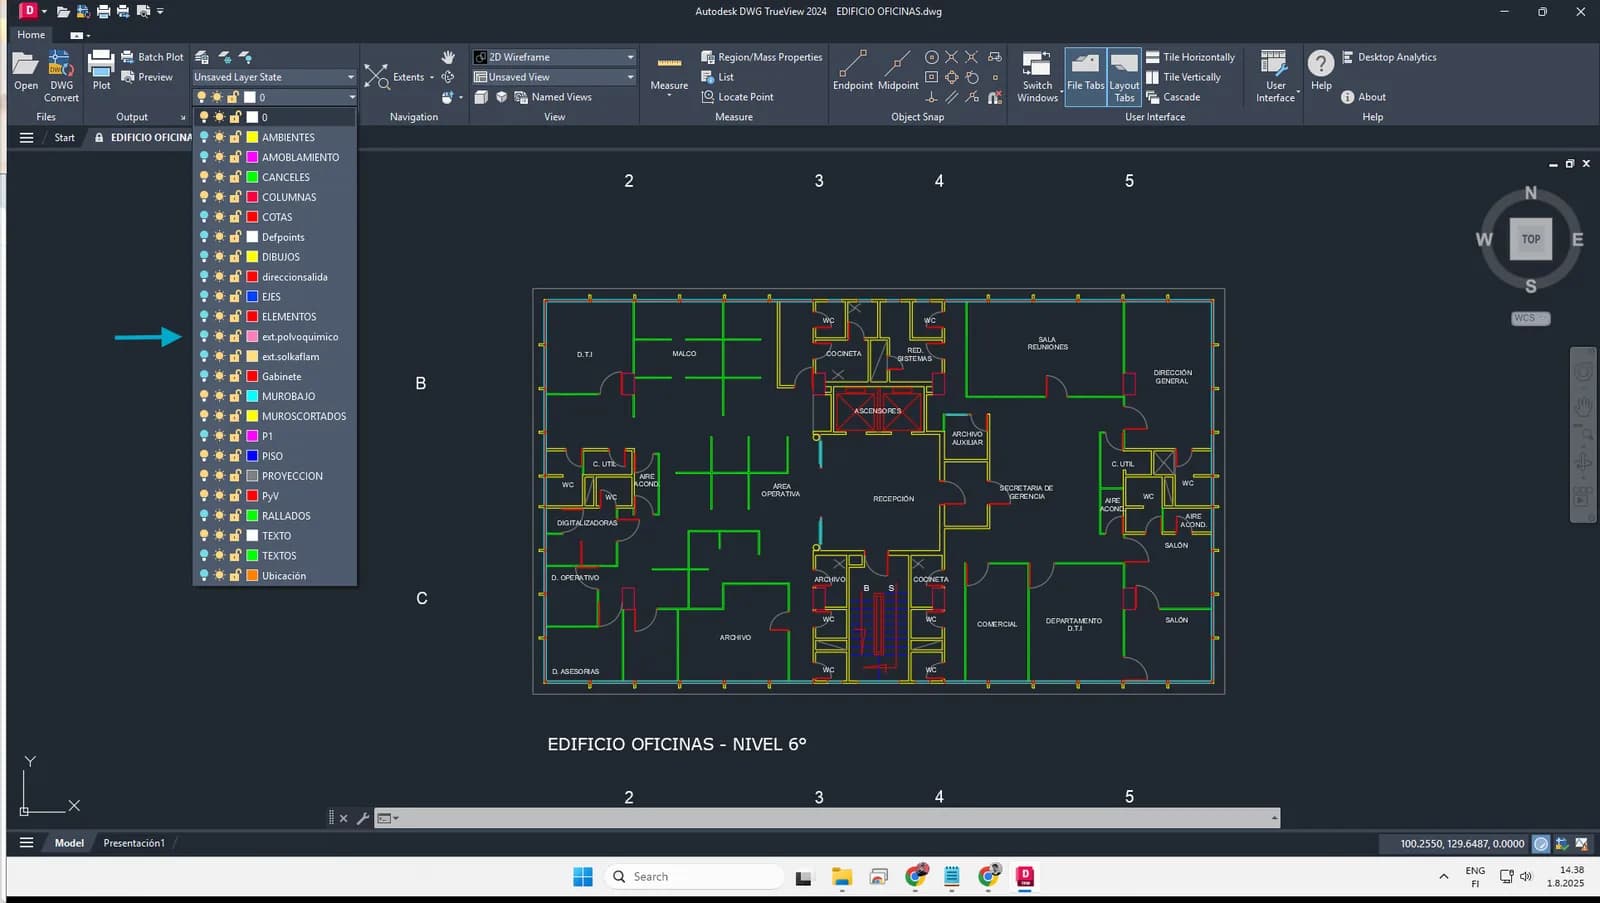
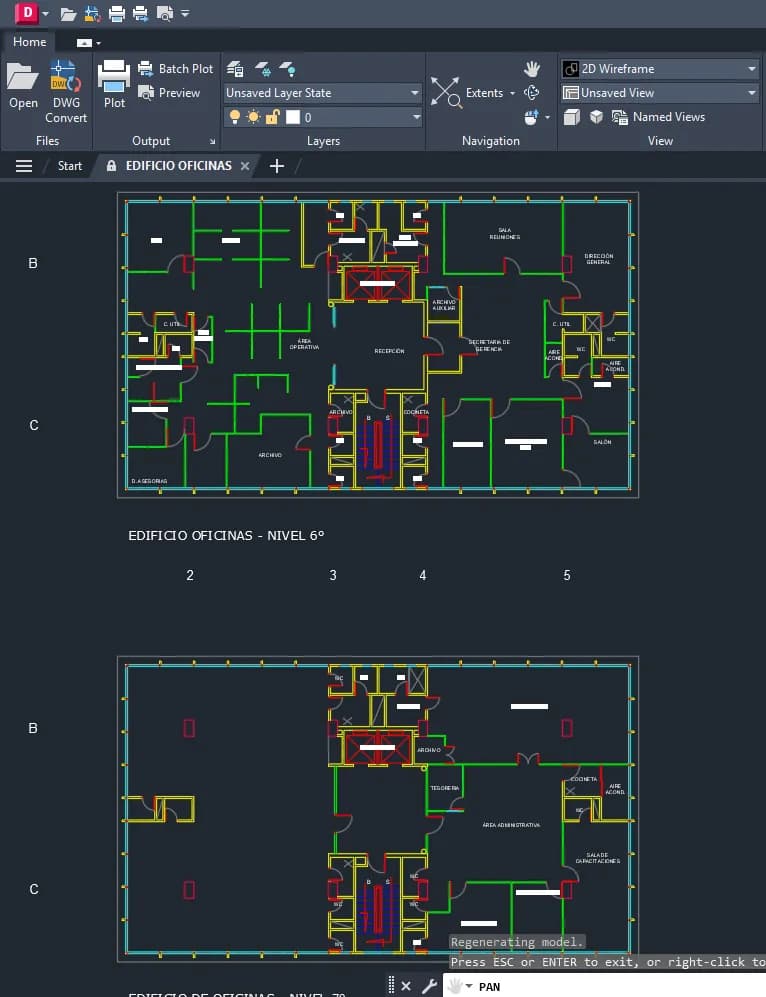
- Turn off extra layers to make the drawing clearer — you only need walls, doors, windows and space texts.
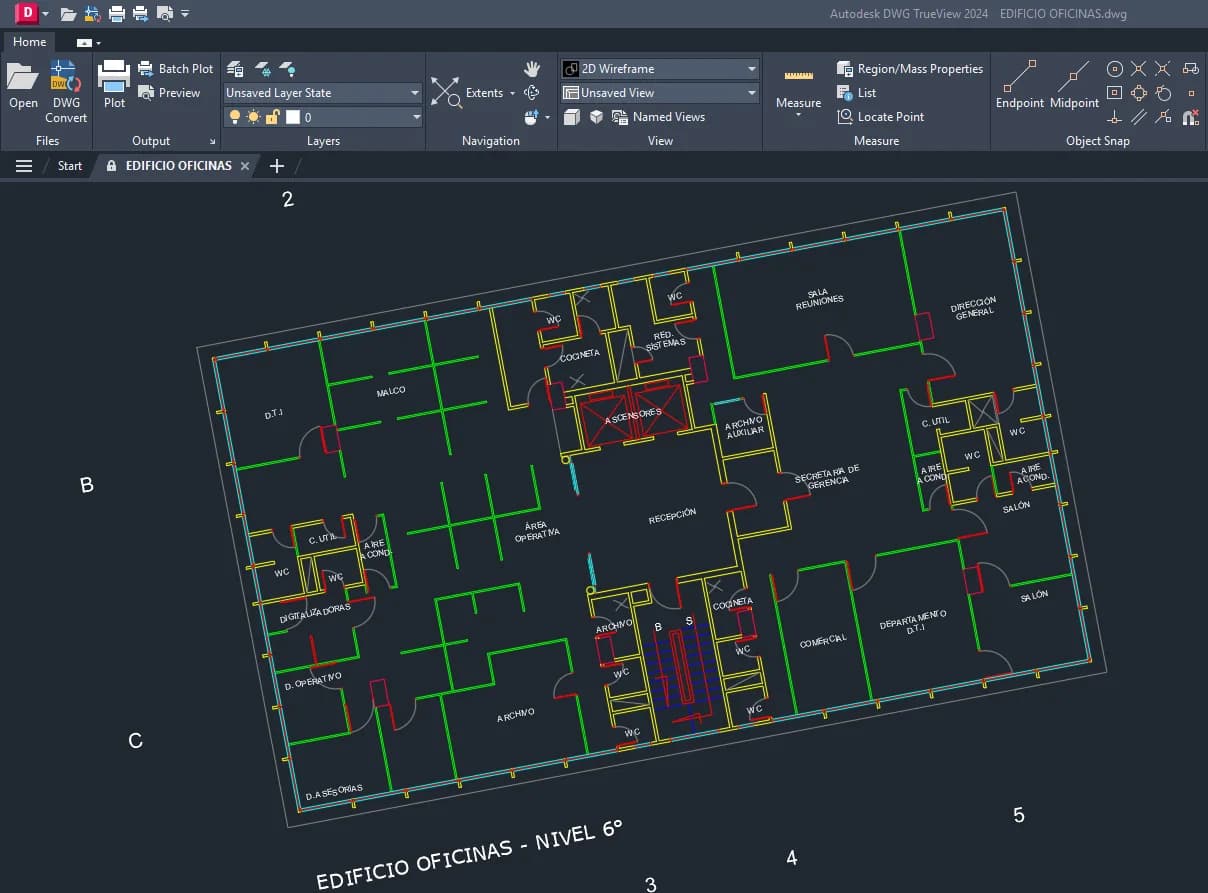
- Rotate the view so walls sit at 90° angles relative to the screen.
- Set a suitable plot scale so your PDF ends up at a known scale, for example 1:50 or 1:100.
Turning off layers for clarity
A lot of drawing elements distract the AI — furniture and annotations in particular. For the best result, keep only the layers that describe the building itself.
Leave on layers containing:
- Walls
- Doors
- Windows
- Stairs
- Space texts
Turn off layers with measurement lines, module lines, suspended ceiling lines, furniture, fixed furniture and similar annotation content. In AutoCAD you do this by clicking the lightbulb icons in the layers dropdown — the result is a much clearer drawing.
Straightening rotated drawings
If the drawing is rotated, align it so that most of the walls line up with the X and Y axes. The current AI models straight, 90° walls more accurately than diagonal ones, so straightening the view before plotting directly improves the model.
Plot (print) settings
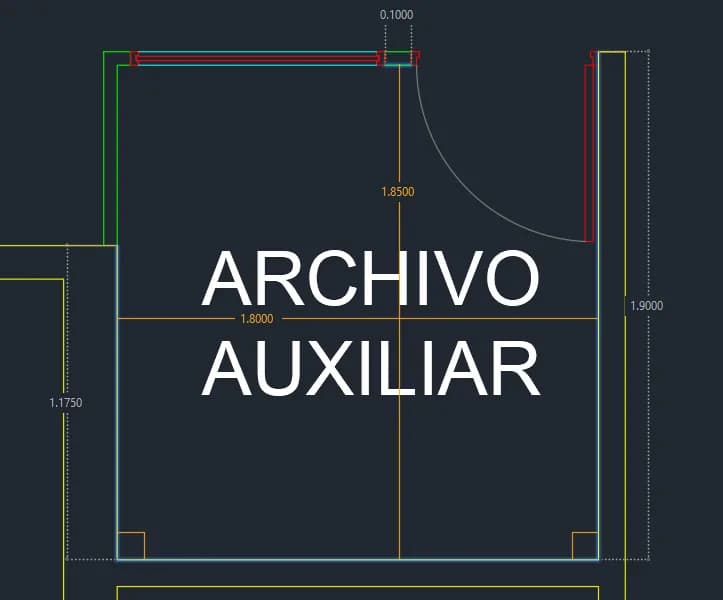
Before plotting, use the measuring tool to work out what one AutoCAD unit represents in the file — in most drawings it's 1 meter. You need this to choose a plot scale.
Step by step
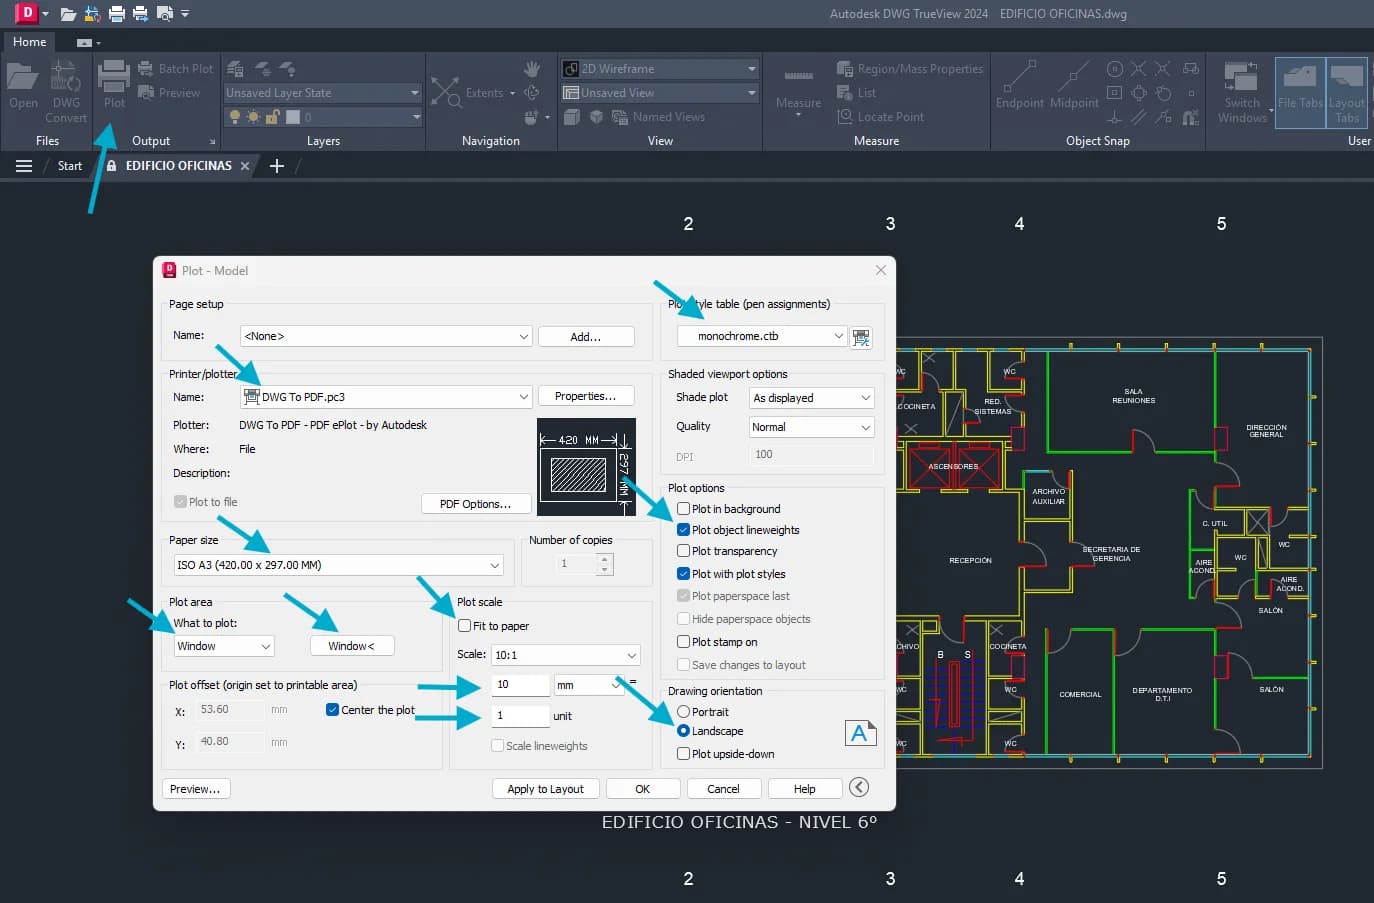
- Click Plot in the top left corner of AutoCAD.
- Set Printer/plotter to
DWG To PDF.pc3. Other PDF plotters can also work. - Under Plot area, set What to plot to Window (layouts can also work), then click Window< and draw a rectangle covering the single floor plan you want to export.
- Set Plot style table (pen assignment) to
monochrome.ctb. This makes every line black. - Under Plot scale, disable Fit to paper and set an explicit scale.
- Click OK and save the drawing to a file. Click Continue if a dialog box appears.
Choosing a plot scale
Experiment with combinations of the mm/inch value, the unit value, the paper size and the drawing orientation. For a drawing that uses meters as its length unit, these settings work well — essentially 1 unit (1 meter) becomes 10 mm (1 cm) on paper:
- 10 mm
- 1 unit
- Paper size: ISO A3 (420.00 × 297.00 MM)
- Drawing orientation: Landscape
You can also try disabling Plot object lineweights, which makes every line equally thin. This helps when the DWG contains very thick lines that hide other lines.